How I Built My Cybersecurity Home Lab from Scratch
Week 1 of 10 — Build Your Lab Environment
Before We Get Into It: What Is This Project?
This is a ten-week lab project where I am building a realistic, small-scale enterprise IT environment from scratch and documenting every step of it publicly. Not just the polished, working end result, but the confusion, the errors, the moments where something stopped working and I had no immediate idea why.
The idea is to build something that actually resembles what you would find in a real environment — Active Directory, Microsoft 365, cloud infrastructure, endpoint management, backup and recovery, monitoring, and incident response — all working together as one system. By the end of week ten, the lab should function as a complete end-to-end setup where problems can be introduced, investigated, and resolved in a controlled way.
Each week focuses on a different layer of that environment. And each week gets written up here, so you can follow along, learn from what I build, and — more importantly — learn from what breaks.
This is Week 1. We are starting at the very beginning: building the foundation.
The Plan for Week 1
Before you can do anything interesting in a home lab, you need somewhere to do it. That means virtual machines. Week 1 was about getting two systems up and running in an isolated network so they could communicate with each other:
- A Windows Server VM (which will eventually become a Domain Controller)
- A Windows 10/11 client VM (representing an end-user workstation)
Both machines needed to be on the same internal network with static IP addresses assigned, so that later weeks — setting up Active Directory, joining the client to a domain, configuring DNS — could build on a stable foundation.
Simple enough in theory. In practice, it gave me one problem I genuinely did not expect.
Getting the VMs Running
I set up both machines using VirtualBox. The first VM was named DC01 — short for Domain Controller 01, which is what it will become in Week 2. During setup I pointed VirtualBox at the Windows Server 2022 ISO and configured the hardware before booting.
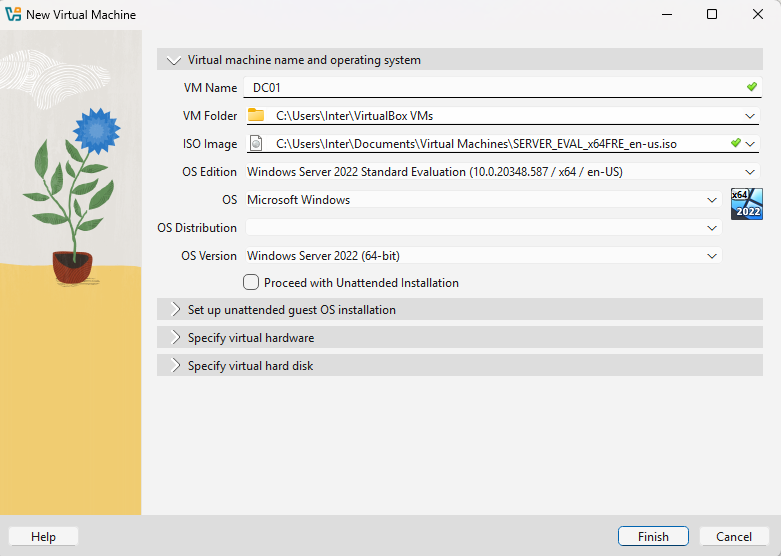
Once the hardware was configured — 4GB RAM, 2 CPUs, and a 50GB dynamic disk — the VM details looked like this in VirtualBox Manager:

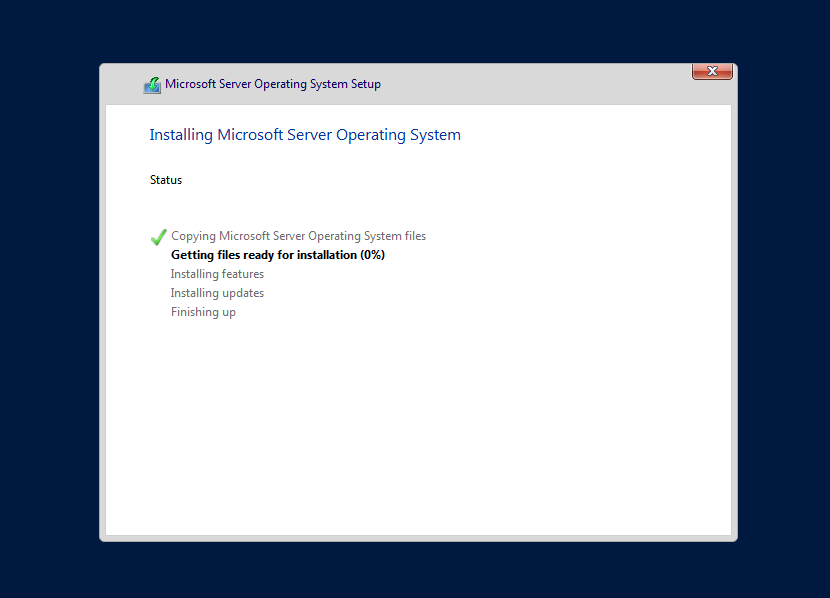
With the VM created, I booted it from the ISO and let the Windows Server installation run.
For the network configuration, both VMs were attached to an Internal Network adapter in VirtualBox. This creates a private network that only the VMs can see, completely isolated from the host machine and the wider internet. That isolation is intentional — it means I can break things, reconfigure things, and simulate issues without any risk to the outside world.
Once both machines were running, I assigned static IP addresses manually. The server was configured at 192.168.10.10:
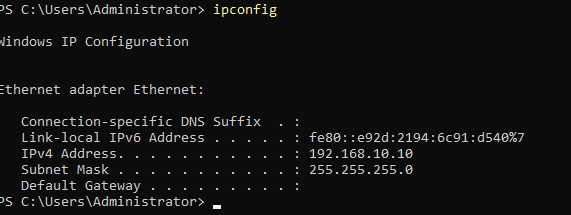
With the addresses in place, I ran a quick ping test from each machine to the other. Both came back clean. The internal network was working, the IPs were correct, and the machines could see each other.
I saved a snapshot, noted everything down, and shut both machines off.
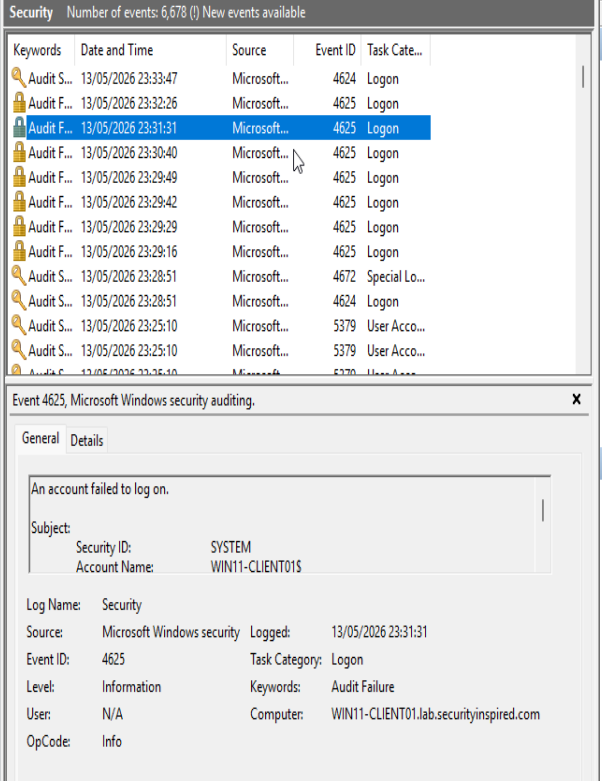
The Problem That Caught Me Off Guard
When I started the VMs again later, something had broken.
The ping tests that worked before were now failing completely. Neither machine could reach the other. I went through the obvious checks first — IP addresses were still correct, both VMs were still on the same Internal Network adapter, no configuration changes had been made. Everything looked fine on paper, but communication had stopped.
The first thing I did was run Get-NetConnectionProfile in PowerShell to check the network profile on the server:
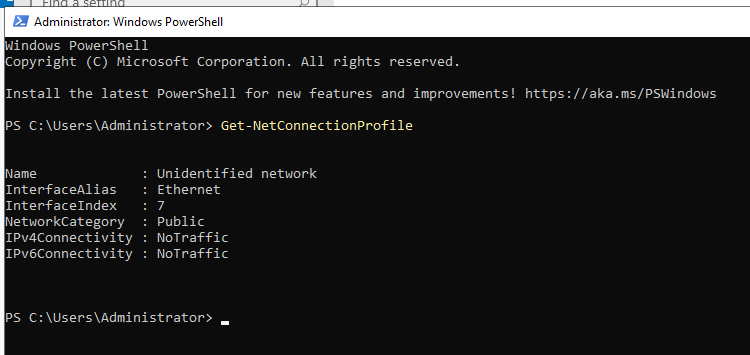
There it was. The network profile had automatically switched to Public after the restart. Windows applies different firewall rules depending on which profile is active — a Public profile is designed for untrusted environments and is much more restrictive about what traffic it allows through. The isolated internal network had no DHCP server or default gateway, so Windows could not identify it and defaulted to treating it as a public, untrusted network.
I changed it back to Private using Set-NetConnectionProfile:
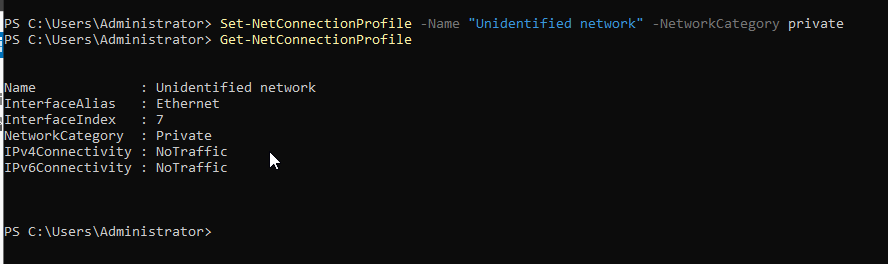
The profile was now showing Private. I ran the ping tests again and expected that to be the end of it.
It was not. The machines were still not communicating.
What Was Actually Wrong
Changing the network profile back to Private had not been enough. The Windows Defender Firewall was still blocking traffic, and with the network profile now correctly set, I could see the firewall state on the Private network profile clearly:

The firewall on the Private network needed to be addressed directly. Once that was resolved, I ran the loopback ping first to confirm basic networking was intact on the server itself:
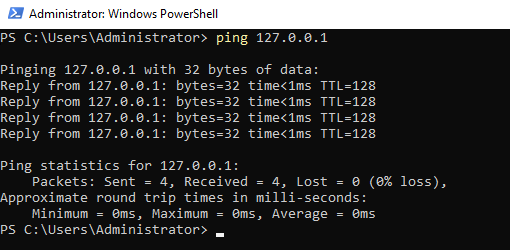
Loopback working. Then the real test — pinging from the Windows 11 client across to the server:

Four replies, zero packet loss. The connection was stable and remained stable across subsequent restarts once the firewall and profile were correctly configured.
What This Actually Taught Me
I have read plenty of networking guides that treat connectivity problems as a simple matter of checking IPs and cables. This experience was a useful reminder that it is rarely that simple in practice.
The problem here was not the IP configuration. It was not even really the network profile setting in isolation. It was the interaction between the network profile, the firewall state, and a system restart — three things that appeared correct individually but produced a failure in combination.
That kind of layered problem is exactly what you encounter in real support scenarios. When something stops communicating, the answer is almost never the first thing you check. You work through the layers — addressing, profile, firewall, service state — until you find where the chain breaks.
Week 1 gave me a small but genuine version of that experience, and it is a good foundation for everything that follows.
What Is Coming in Week 2
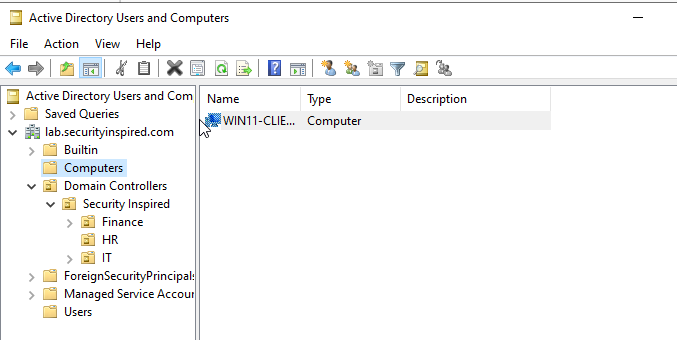
With the lab environment stable, Week 2 moves into the first real piece of infrastructure: Active Directory.
I will be installing Active Directory Domain Services on DC01, promoting it to a Domain Controller, creating users and organisational units to simulate a company structure, and joining the client machine to the domain.
If you want to follow along, the full project runs for ten weeks and each post will be published here as the lab progresses.
If you found this useful or hit a similar issue in your own lab, feel free to get in touch. I am always happy to talk through troubleshooting approaches.